Pages

Thursday, March 27, 2014

A quilter I am not

I am not a quilter by any stretch of the imagination.  I am a garment sewer.  However, when I come across Christmas panels, I just can't seem to help myself!

This panel came from a friend who was selling all of her mom's sewing supplies and she asked me to help her sort and price everything for a garage sale.  I was more than happy to help.  The garage sale was over two years ago and I've just finished this Advent Calendar.


It has cute little pockets for treats lining the tree and the sides.  The panel was printed by Mankower, UK.  I had never seen this panel here in the US before, but then again, I try to put my blinders on when looking at Christmas prints because I am such a sucker for them.  Not sure which year it was produced but it sure is cute!


I can't wait to fill all of those little pockets for Christmas this year.  This will make a great addition to my Christmas decorations since I didn't have an advent calendar already.


Just a short post today.
Until next time -
Happy Sewing!

Tuesday, March 25, 2014

April Garment of the Month Challenge selected

For the April MAGAM Challenge - I'll be making New Look #6224.  A very cute dress with different neckline and sleeve options.   The fabric is a rayon that I picked up at the ASG Garage Sale last year.  I remember I only had two fabrics in my hand, this one and a green/white check fabric and a lady was trying to buy this purple print fabric off of me before I had even purchased it!


I think this dress will turn out pretty cute, but I can't decide which sleeve variation to do:

View D - the main version in the photo with the longer sleeves - perfect for the cold office in the summertime - for some reason, our office is always cold in the summer!

or

View C - the red version with the shorter ruffled sleeves - good for someone with a small bust (like me!)

What do you think?

Happy Sewing!

Sunday, March 23, 2014

Challenge Fabric leads to Cute Cape!

Every year, the Rocklin Neighborhood ASG Group has a fabric challenge.  And it's not your average challenge. Some of us dread this event and others look forward to it with great anticipation. 

Our lovely fabrics are some of the leftovers from our annual garage sale that didn't sell - so you can imagine we get some beauties!  Each piece is in a brown bag and you never know what you are going to get.  Well, two years ago, this lovely piece was selected by an unsuspecting member who hated it.  I, on the other hand, absolutely loved it when it came out of the bag and asked if she would mind trading.  Naturally, she was glad to trade and I was so excited!   


It's a cheap piece of polyester, silky type fabric, but I knew I had some purple wool at home that would match perfectly with it!  Our challenge was to make something, anything, out of our delightful piece of fabric and I had the perfect garment in mind.

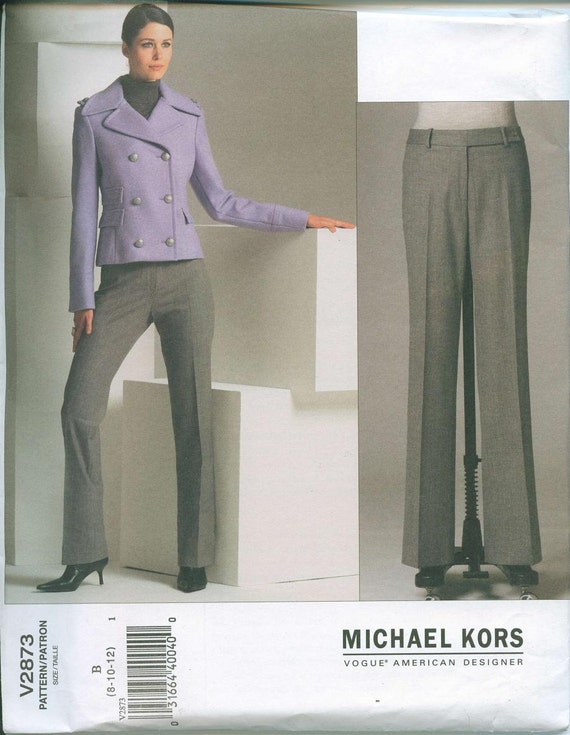
I made the 1930's Capelet from the Decades of Style pattern company.  I had been wanting to make this pattern for awhile and knew this would work out great.  I originally bought this purple to go with this material, but changed my mind when the challenge fabric came about.


I made size B, following the lines for a 36" bust.  The pattern only calls for 2 buttons on the front, one at the top and one at the bottom.  Two buttons wasn't enough so I added the two additional ones in the middle.


The top buttonhole is an inseam buttonhole.  As long as you following the pattern markings, this is fairly simple to do.  As for my covered buttons, they were a bit of a challenge.  Since my fabric was so thick, I couldn't get it to work with the covered button kits.  After a few unsuccessful attempts, I noticed that the fabric seemed to be coming apart - as in there were two different layers to the fabric.  So, I tried to carefully pull the layers apart and voila!  The new "half thickness" fabric worked great for the covered buttons.

Here's the side view.  I am not happy with the bulk of the facing around the bottom, but when you see the inside, you will see why the ridge of the facing shows.

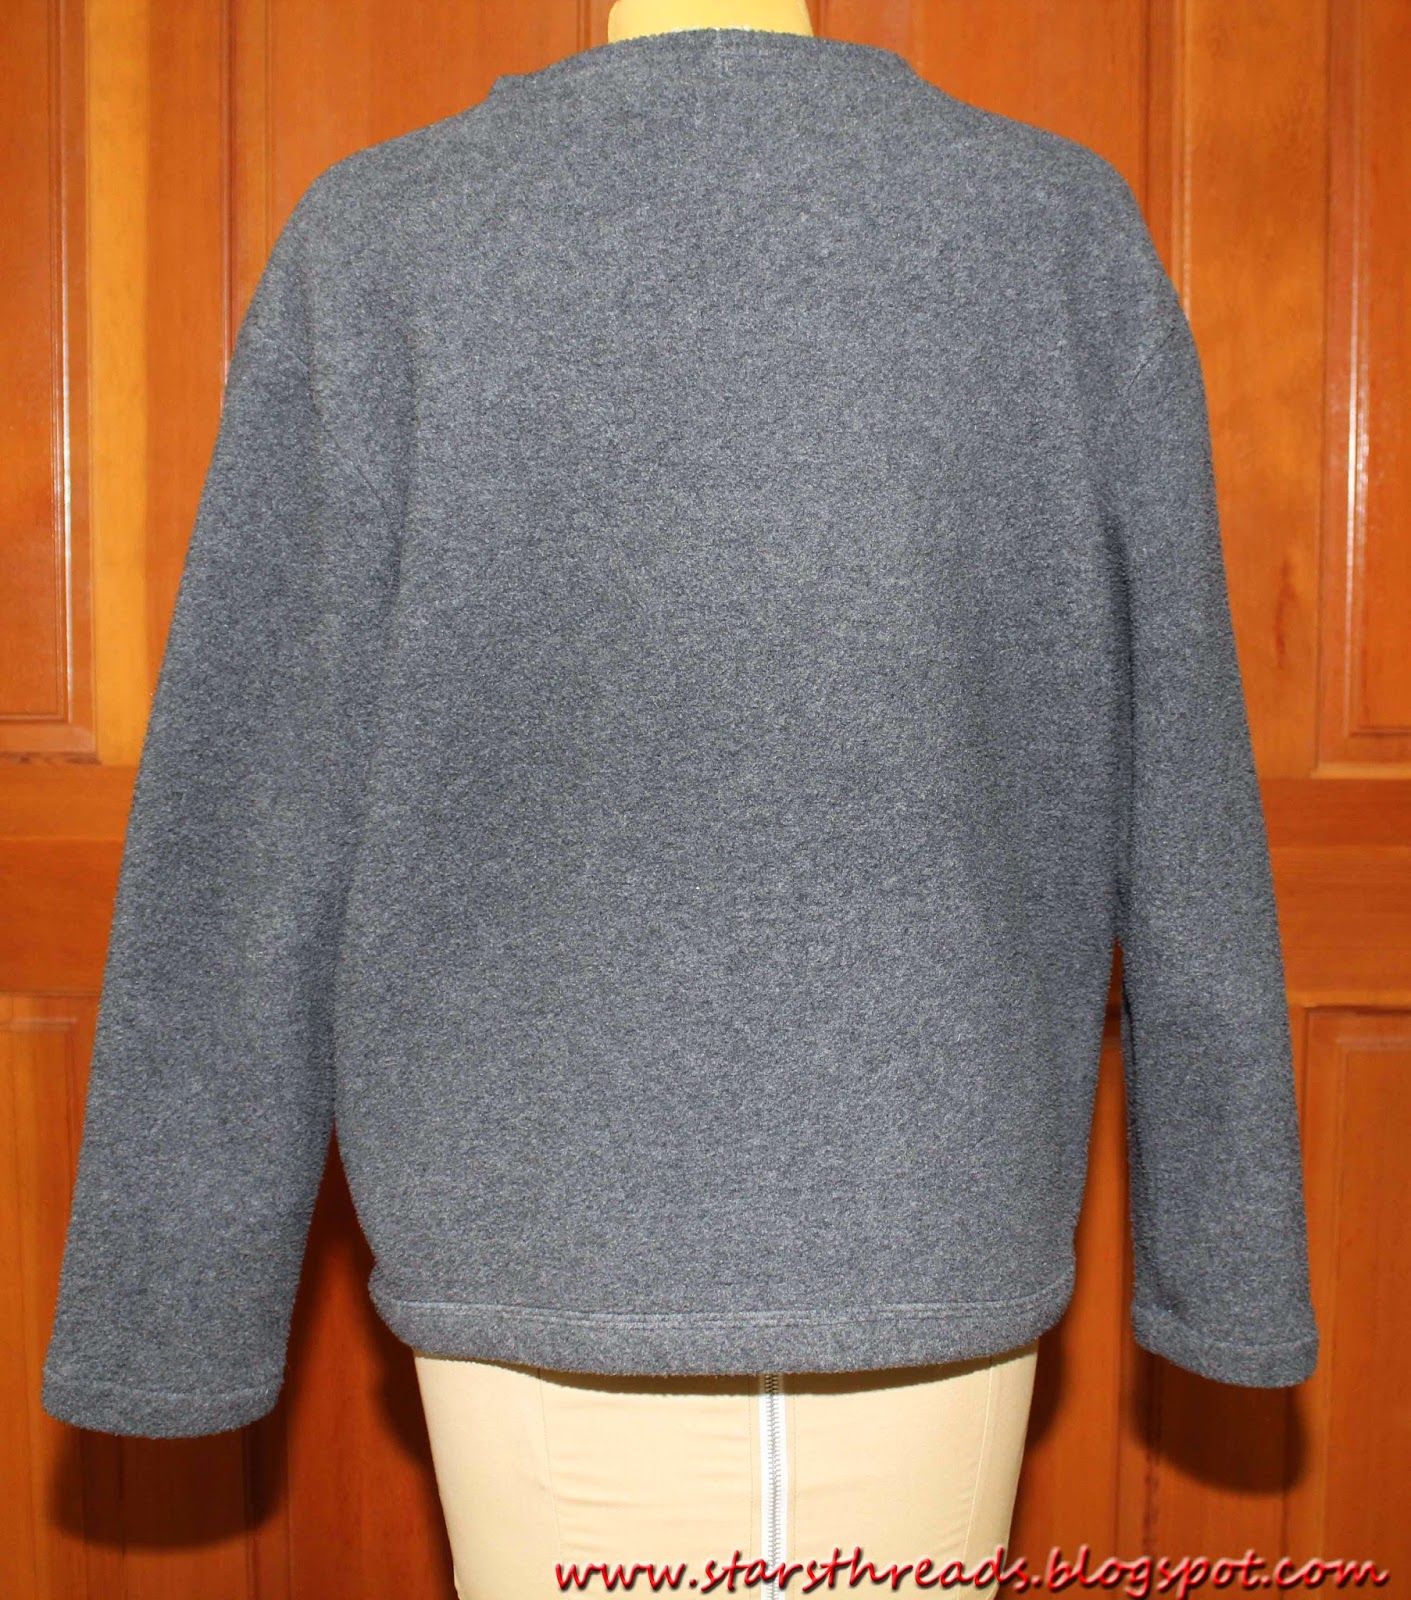
Here's the back view.  The capelet falls nicely over the back.

And that crazy lining!  Doesn't it match perfectly!  I added rick rack along the edges as well.  Each one of the rick rack points needed to be sewn down by hand as well, because they kept sticking out funny.  Also, the pattern doesn't call for a lining, but after seeing this fabric, I just couldn't resist adding one.


Side view of the inside.  You can see the capelet portion thru the armhole.  The caplet is left unlined.

Close-up of the armhole facing.
And more of the crazy lining!  I just love it!

Here's why there is a ridge from the facing on the right side.  Again, the pattern doesn't call for a lining, but I wanted to add one and add the rick rack along the edge.  Since I wanted to add the rick rack, this meant I needed to turn the fabric under to just have one side of the rick rack points show.  So in turning the fabric, I now have essentially 3 layers (2 of the facing layers and one for the rick rack) - this 3 layer thickness is what is causing the ridge to show on the right side.

Now maybe if I would have underlined the base fabric, this ridge wouldn't show, but it's too late now - I'll just live with the ridge.

In this final view, you can see how the capelet portion attaches to the front and hangs over the back.  I left the capelet portion unlined and just finished with some bias binding around the edges.

Until next time - Happy Sewing!


Wednesday, March 19, 2014

March Sweatshirt Challenge Project

The topic for our March ASG meeting this month is sweatshirt makeovers.  This ties in perfectly with my recent closet clean-out project too!  In my quest to clear up some space, I came across this oversized fleece top I've had for awhile, but haven't worn so this was going to be the perfect starting point.

As you can see, it started out as a pretty boring sweatshirt. Way too big and lacking style.

Front view
Back view

Next, I starting gathering a bunch of potential candidates to assist in the makeover.  I had felted sweaters, various fabric pieces both knit and woven and a bunch of trims.  After trying various combinations of the items below, I finally settled on the felted sweater in the top left of the picture below.


I was so engrossed in the makeover project, that I forgot to take pictures of the starting sweater so I've used the one below as an example.  

After removing the collar from the sweatshirt, I cut the felted sweater along the red lines indicated below, being sure to keep one of the side seams intact. Then, I started draping and folding the sweatshirt to see what it wanted to become.  

The back was way, way too big, so I pinned in some darts.  One along the center back line and two about two inches apart from that.  I didn't like just the look of just straight darts so I flared out the bottoms of the two outside darts.  Each dart was a fold of 1 inch, therefore taking up a total of 6 inches in the back.


Now I had another 6 inches in the front to take out.  The sweatshirt seemed to naturally fold at an angle, so I decided to go with that.  I pinned on a zipper, and started draping the lower portion of the felted sweater to become the collar.  I pinned on some leftover zippers along the edge of the collar and liked the look of that but it was still missing something.  I found these large plastic buttons in my button stash the pinned them along the edge of the collar too - perfect!

The bottom portion of the sleeves are from the top front and back of the felted sweater.  They seemed to work perfectly for this new purpose.

The pocket is a piece cut from the turtleneck of the felted sweater.

After an afternoon of sewing, cutting and contemplating, here's the finished product!  Pretty snazzy if I do say so myself!  The collar gave me a little bit of hassle but after a 15 minute break to clear the mind, I finally figured out how to get it to work.

The darts in the back stuck out too much when I first sewed them so I decided to fold them flat and sew down the middle of each one.  I really like how they turned out.


Until next time, 
Happy Sewing!

Monday, March 17, 2014

Recent shopping trip leaves me speechless!

I haven't been to Stonemountain and Daughter Fabrics in Berkeley, CA in more than 12 years.  When I walked into the store on Saturday, with my Husband and Mom and Dad in tow, I was left speechless - not by the amount of fabric in that little store, but by a follower of my blog!  

Not more than 10 steps into the store and a lovely lady said to me "I know you, I follow your blog".  I was so excited, stunned, proud and for once in my life, totally speechless all at the same time!  How exciting to meet one of my followers!!!  I was so excited I completely forgot to say even thank you or ask her opinion of my blog and worst of all, I've already forgotten her name!  What a perfect selfie opportunity with a follower and I completely blew it! So to my lovely follower I say thank you for the wonderful compliment and next time, I will be prepared!  

Needless to say, my head had grown so big at this point, thinking that the Sewing Paparazzi was going to pop out from the quilting cottons around the next corner, that I almost forgot why I was there - oh yeah - to shop for fabric! 

With my big list of fabrics in hand, I was off to see what fabulous fabrics wanted to jump in my cart.  With only 1.5 hours on the parking meter and time ticking on, I needed to get to it!  The store arrangement was quite different from when I was last there oh so long ago, so I needed a little while to just wonder and see what I could find.  

I ended up with a cart full of wonderful things....


Here's a close-up of the haul.

Plans for the fabrics so far are:

With the lovely tan and blue Ikat in the upper right corner will be Vogue 1309 - an Issey Miyake pattern that I've been searching for the perfect fabric.
Vogue Patterns 1309

The burgundy and black wool in the lower right hand corner will be Vogue 2873 - a Michael Kors jacket. This was a steal - an Italian Wool normally $24.00 a yard on sale for 1/2 off!
Vogue 2873 Michael Kors Designer Original Pattern Sizes 8-10-12 Dress Pants Pea Coat Blazer

The crazy fun print in the middle of the bottom row will be Simplicity 2364 - a pattern I still need to purchase.
Simplicity 2364

And if there is enough leftover, I might make this one again as well - Vogue 8817.  Wouldn't that fun fabric look great on the bottom of this top?
V8817

As for the remaining two knit fabrics, I don't have anything in mind for them just yet, but they will make a great addition to my stash.  If you have any ideas, please leave me a comment!

Until next time,
Happy Sewing!


Sunday, March 16, 2014

March Make a Garment a Month Challenge - Done!

Simplicity 2369 was my March project as part of the Make a Garment a Month Challenge and it's done! Yippee!!  This is a mock-wrap dress with a tie on the left front.  No zipper to mess with and no gaposis on the front neckline either!


For the dress, I used the top and longer sleeve from Simplicity 2369....
Simplicity 2369

and combined it with the fuller skirt of Vogue 8784 - View A.  I really like the fuller skirt on the Vogue pattern and thought it would fit my body style better than the "straightish" skirt on the Simplicity one.
V8784


Besides - it twirls better too!


I added 5 inches to the length of the dress, but ended up cutting that off when it came time to hem it.  After the almost finished dress hung on my dress form for a few days, it gained a little in length and the 5 inches I added was way, way too much.  The also cut off 2 inches from the sleeve length.  

To help eliminate possible gaposis along the neckline, I fused 1" strips of interfacing along all edges of the neckline.  This helps to stop the edge from stretching when the neck facing is sewn on.  This is not a step included in the directions although it should be.  To do this, lay your cut out fabric piece right side down on your ironing board.  Next, lay your matching pattern piece on top of the fabric and make sure the neck edges line up both in length and width.  When you have the fabric matched so the same size as the pattern piece, remove the pattern piece and simply fuse the 1" strips of interfacing to the wrong side of the fabric along the neckline edge.  It's ok if the interfacing pieces overlap a little bit.  

My eyes were getting a bit crossed after lining up all of those circles, but I think it was worth it.

Overall, quite a successful dress and I'm sure I will make a few more.  It is very comfortable to wear and doesn't require any ironing.  Although I am one of those odd souls who kinda likes ironing.  

This pattern will absolutely be sewn up again.  I can see a few of the blouse versions and one more dress in my future. Next time, I will lengthen the shorter tie and maybe shorten the longer tie.  I might even try the dress without the fuller skirt. We'll just have to wait and see!

Until next time - 
Happy Sewing!


Sunday, March 9, 2014

March Garment of the Month Challenge Determined

I've decided to make March's Garment of the Month Challenge a little easier than my February one (which still isn't completed).  Using Simplicity 2369 - I will make a knee length, mock-wrap dress with the longer sleeves.  I have some great knit in my stash already - it's black with white circles on it that I picked up at Mill End Fabrics in Reno last summer.


I will change the style from a straight dress to one with more of a flare at the bottom though - I tend to like that style a little better. So it's off to pattern altering I go!

Happy Sewing!


Saturday, March 8, 2014

Vogue 1098

This is Vogue 1098 - an out of print Anne Klein swing style jacket.  The lined jacket has a nice V shape line to the front and back and very interesting sleeves - sort of an open curved ending to them - which I opted not to do this time.  

Vogue Patterns 1098


Here's a close-up of the fabric I used for my jacket.  It's a wonderful wool that I picked up at Stonemountain and Daughter in Berkeley probably about 15 years ago.  I love all of the different colors in it - especially the green.


My version of the jacket is a little different than the original.  Although I like the style of the sleeves, I wanted the sleeves on mine to be straight so I left off the bottom rounded style sleeve ending and just extended the length of the upper sleeve.


My green/clear buttons on the front really are the same distance from the front edge - it's just an optical illusion that they aren't in the picture above since one side of the button is green and one side is clear and on top of that, I made the green side face different directions on each button.    

Because the buttons are so large, I didn't want to do a buttonhole that big so instead, I opted to sew snaps behind the buttons to keep it closed.  There is a small fabric covered snap behind the top edge of the right front as well - this helps to keep that little piece of fabric in the corner lay nice and flat as well. 


See how nicely that little corner piece lays flat in the picture below?


The back has a nice V shape to it, which you can sort of see in the pic below.  


The side view brings out the "swing" style more.


My lining is a bit mixed up this time.  The skirt (still in process) took most of the lining so I only had enough to do the front and back pieces.  I had some plain gray in my stash and decided to use that for the sleeves.


Here's the back view.  The print lining I picked up at a store that resells fabric - kind of like a Habitat for Humanity Restore for the home sewer - What a great concept!  I'm sure the fabric is some polyester left over from the 50's, but I love it!

That's it for now!  Until next time - Happy Sewing!

Friday, March 7, 2014

Sewing Machine Feet Organization


Just a quick idea for everyone today.  If you have alot of extra feet for your sewing machine/serger that need a home, how about using a plastic organizer such as this.  These are available at any craft store and are used for sorting needlework floss or other small items, but they were great for machine feet as well. Just add a little label, and one more item in your sewing room is organized!


Happy Sewing!

Wednesday, March 5, 2014

Thrift store bargain causes shoe and necklace makeover!

I love to go thrift store shopping.  A few weeks ago, I ventured into my favorite local Salvation Army store and found this fabulous deep teal blue dress hanging in the window.  I asked the store clerk if they knew what size it was and they brought it down for me.  It was a size 6 and "The Limited" brand - BINGO!  There were a few stains on it, but my trusty stain remover at home would surely get them out so I opted to splurge on the $4.50 dress.  Who knows how much this would have cost when it first graced the aisles of The Limited retail store.

Of course, I had nothing go wear with the dress which spurred on a few new projects I had been wanting to try.  


First, I had no shoes to wear with the dress.  I wanted to try dying a pair that was destined for the donation bin, so I pulled them out.  I figured I had nothing to lose since I was going to get rid of them anyways.


Next, it was off to the internet to find some shoe dye.  I found this kit for only $6.99.  It comes with the preparer solution, instructions in every language I could think of and then some, a sponge, brush and finally, the dye.  After briefly reading the instructions, I was on my way.

After the first coat, it didn't look to promising and I had my doubts, but decided to hold out until the end to give my final verdict.


Here's the final product.  Voila!  This was after about 6 coats of the dye.  I learned a few things in the process.  First - be sure to follow the directions!  I probably needed to wait a little longer between coats and also tape off between the bottom of the shoe and the part you want to dye.  Common sense should have told me that since the directions didn't.  Second, I should have used the sponge more to swirl the dye around rather than painting it on so much with the brush.  Either way, I think they turned out great!  A new pair of shoes that only cost $6.99 for the dye!  


Another technique I wanted to give a whirl was using fingernail polish to paint a necklace. I had an old prom necklace that I was never going to wear again so it was going to be my test piece.

Here's the set before....


And with two bottles of nail polish - totally $3.00, I was off and painting.


I am quite happy with the final product!  This was after 3 coats of nail polish.  


And, it perfectly matches the dress!  I'm very happy with it!  Now, I have a bunch of other jewelry to tackle as well.  With all of the colors of nail polish out there, the possibilities are endless!

So here's a total for the new ensemble:
Dress - $4.50
Shoe Dye - $6.99
Nailpolish - $3.00
Grand Total = $14.49!  A brand new outfit for less than $15.00!

Until next time - Happy Sewing!