My March MAGAM Challenge - More, More, Moreish March is complete and I am very happy with it!! Here's Vogue 9108 - a Marcy Tilton pattern. Warning, this post is quite picture heavy, but I hope you will enjoy it.
 |
| Front View |
 |
| Side View |
 |
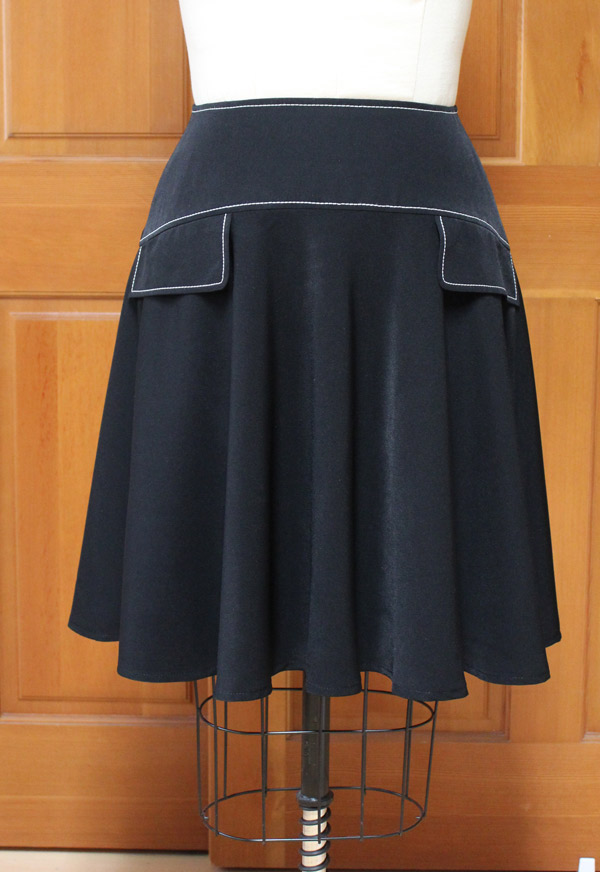
| Back view |
I first started this garment by doing a few pencil drawings to determine the placement of the fabrics. I settled on version #5 as my final garment.

And the final version came out pretty darn close to the concept....
This jumper is described as "close fitting thru bust", but that's where the close "fittingness" stops. I started by pin fitting the tissue pieces together on the dress form to see just how much I was going to pinch out before I even cut out the pieces. Here's the front view just pinned together.
And side view - just look at how much tissue there is!!
Next, I started pinning out big triangles of tissue. Starting at the top, I kept the bustline the same and then folded together a big chunk and pinned again. I started by folding out 5 inches from the center back piece (for a total of 10 inches) and 10 inches on the side back pieces (for a total of 20 inches overall). Here's a before and after pinning view of the back.
And the same before and after pinning of the sides.
I did not pin out any fabric on the front pieces to start with because I wanted to see what the jumper would look like so far. And, I knew I could take in the side seams to make it work.
On the back panel, the hem is supposed to end about 4 inches above the side back panels as you can see in the pic below. I didn't care for that hemline, so I added in a piece to the back to make them even. I guess I could have just extended the back panel a few inches, but that didn't occur to me at the time and I made a separate pattern piece for it.
After cutting everything out, I sewed all of the front pieces together and all of the back pieces together along with the straps and did a pin fitting of the side seams on the dress form.
I still needed to remove more fabric. Here you can see the back side panel is pinned another 6 inches and same with the front piece.
The center back panel sagged funny on the upper back so I decided to pin out some more fabric and make further adjustments.
I ended up taking about 6 inches off of the straps - which moved the entire back section up quite a bit. The good thing with doing this is I can wear this jumper with a strapless bra and without the t-shirt underneath on hotter days.
This picture isn't very clear, but you can see how much fabric I removed on the side seams. The pic on the right has a faint line of red basting I did prior to sewing.
Here's the final garment once completed.
Of course I had to add in some fancy trims....
The back now lays nice and flat with no sagging with the addition of the box pleat in the back.
The criss-cross straps in the back are pretty cool.
Here's the original and my version front views.
And the original version compared to mine for the back. You can see my straps are alot higher, there is alot less fabric in the back and the addition of the back bottom panel piece changes the hemline.
I am super happy with how this jumper and top turned out.
I started with a size Small and after all of the tissue pinning adjustments and final alterations, I ended up removing 54" from the bottom hemline. That might give you an idea of just how much fabric is in the original pattern.
This entire garment was made with pieces from the stash adding a whooping 5.125 yards to my YTD total of 27.875 yards. Whoop! Whoop!
Happy sewing everyone!
Star